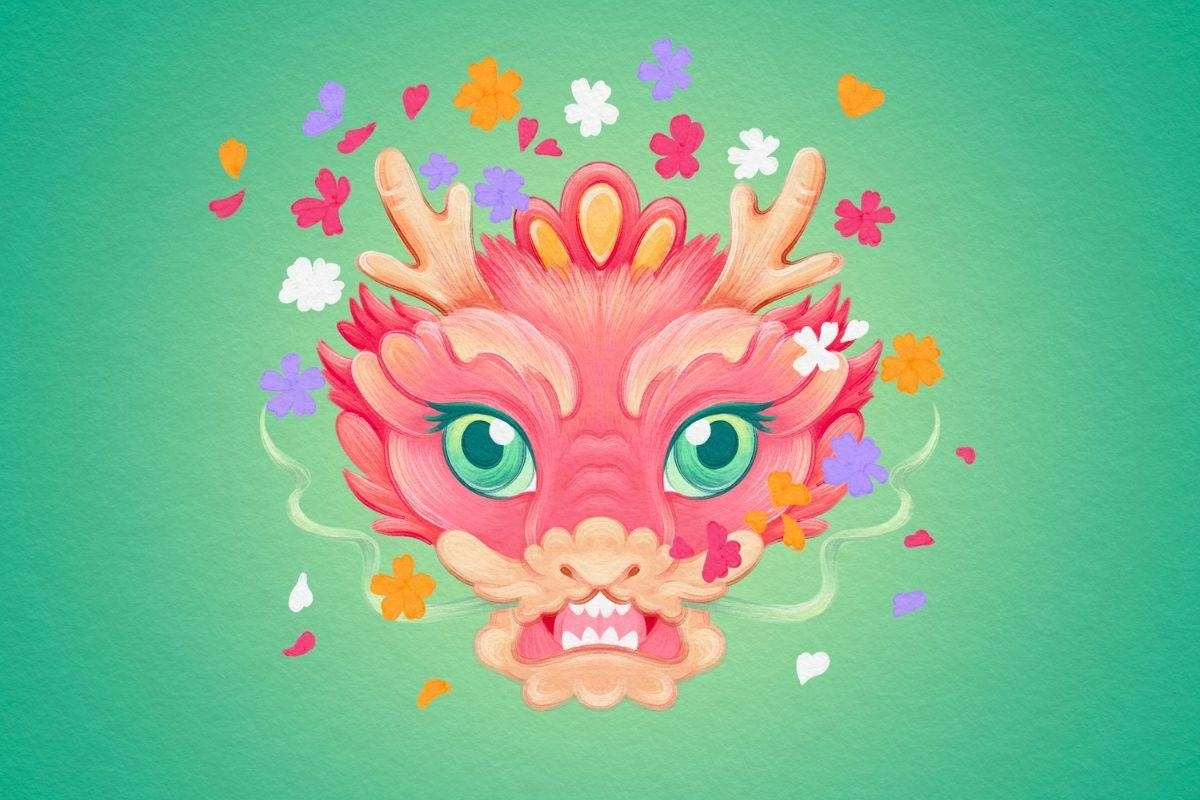
Grab the free brush for this tutorial
Made by Freya · works in any Procreate version
Hello and welcome to the first tutorial for 2024. In today's tutorial we are going to use premium brushes from the Freya Realistic Gouache Brush Set to color this Dragon Head illustration. We'll also be using Procreate's symmetry function as we color.
Please make sure that you're on your iPad when you try to download the swatch palette and sketch file. Download all the tutorial files to your iPad. Go to your Files App and look for the zip file you just downloaded. Tap on the zip icon and it will create a new blue folder with the same name. Inside this folder, you'll find the tutorial PDF, the sketch file (.procreate format), and the swatch palette.
Since both of those files are native to Procreate, just tap on those files and they should import automatically into Procreate. You'll find the imported swatch palette in your Color Panel > Palettes.
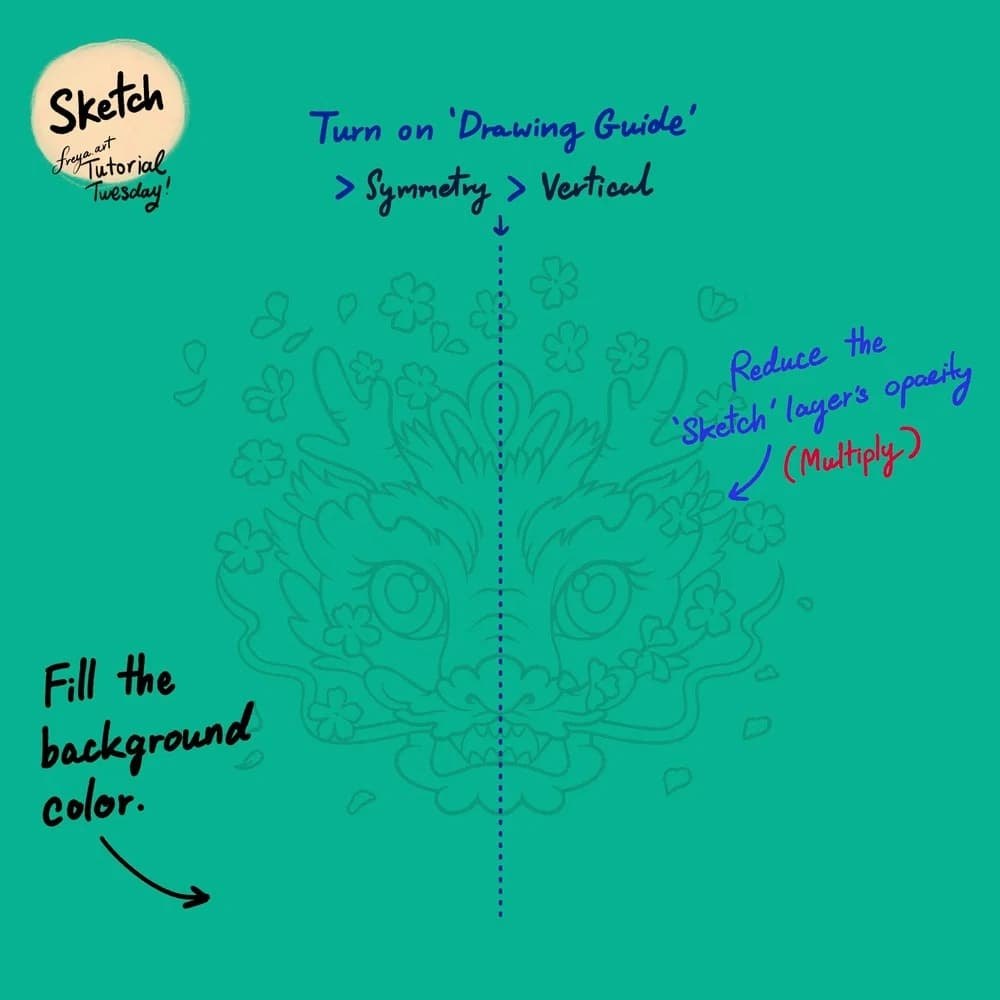
Importing the Sketch File and Palette Swatch
Go to the gallery to find the new project. Lower the opacity of the sketch layer and set it to Multiply (M) layer mode. You can do this by tapping the (N) next to the layer's check box. Then lock the layer. Turn on the Drawing Guide. Go to Actions > Canvas > enable Drawing Guide. Tap on Edit Drawing Guide > Symmetry > Options > Vertical.
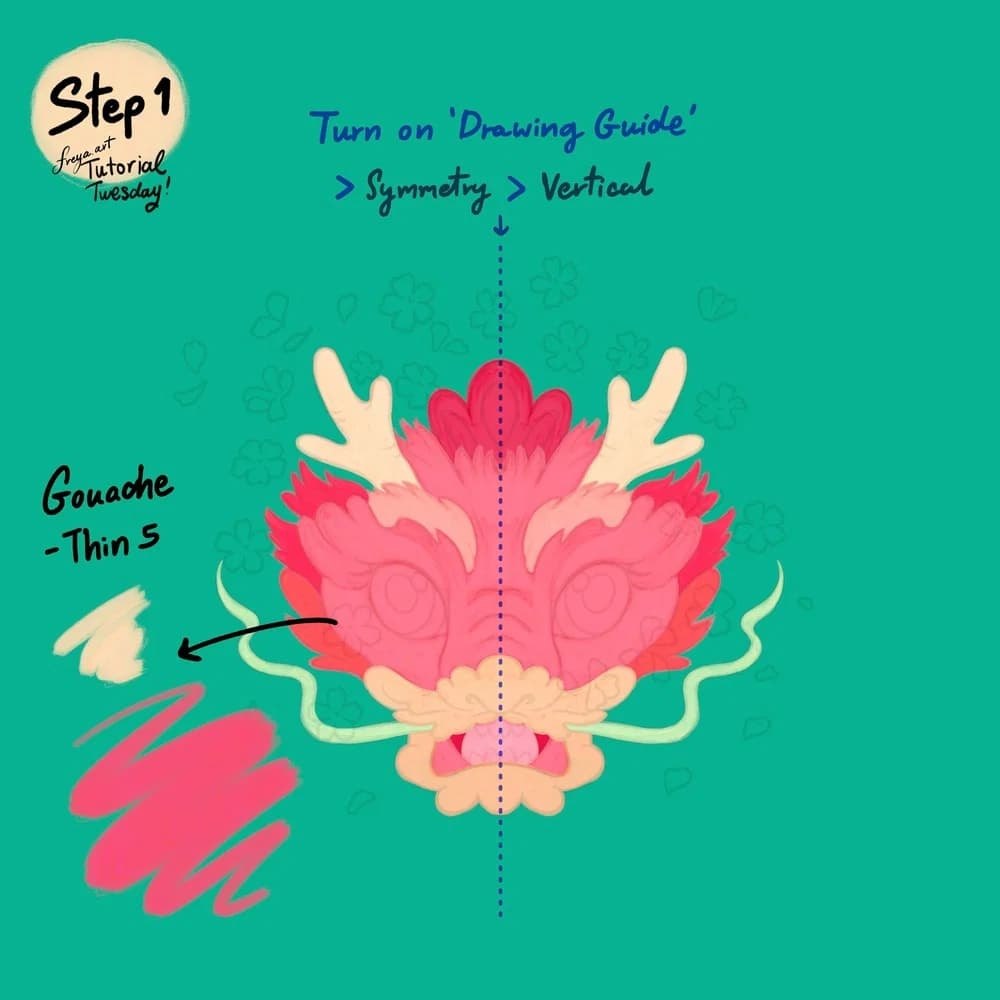
Step 1: Add a new layer underneath the sketch layer. Using Gouache Thin No. 5, add the base colors for the Dragon’s head. I would suggest creating a different layer for each different colored part of the face. Just remember to enable Drawing Assist for each new layer you create.
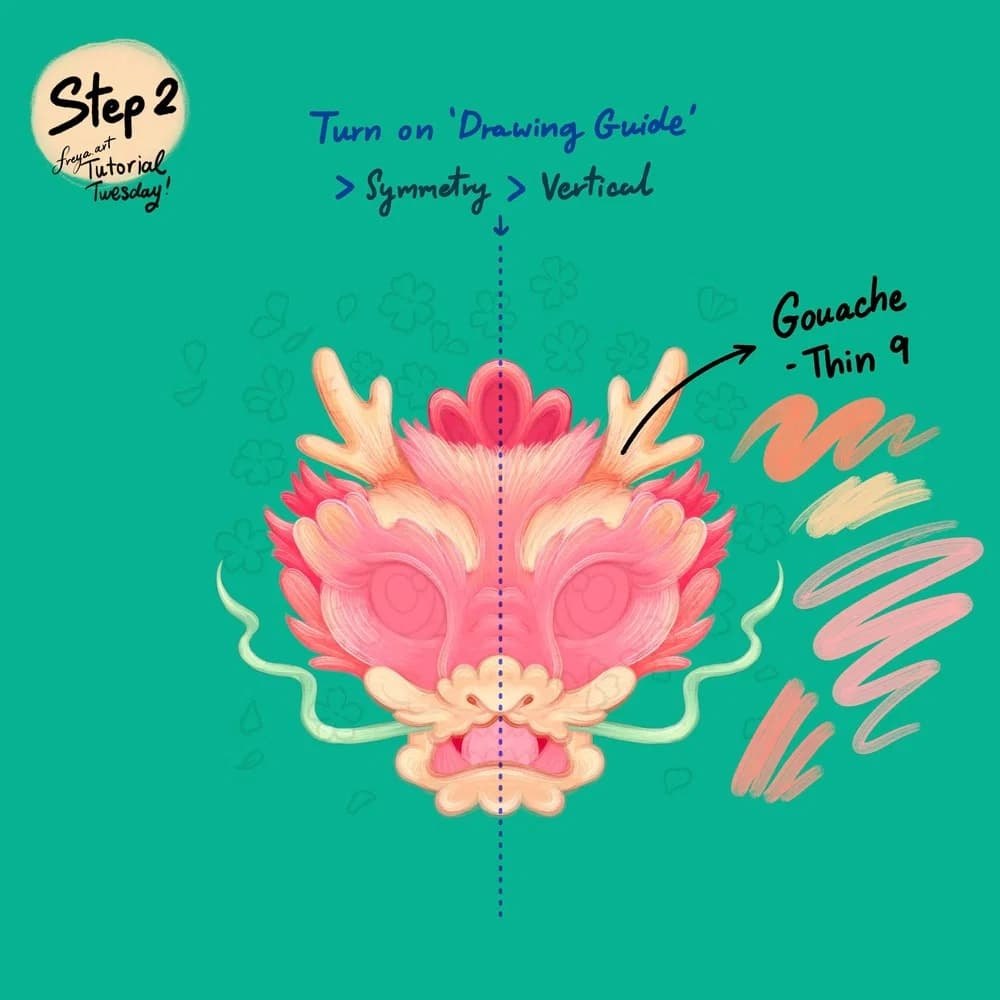
Step 2: Add a clipping mask layer on top of each base layer. Enable Drawing Assist for each layer too. This time, using the Gouache Thin No. 9 brush, add some fine detail and texture to the base layers.
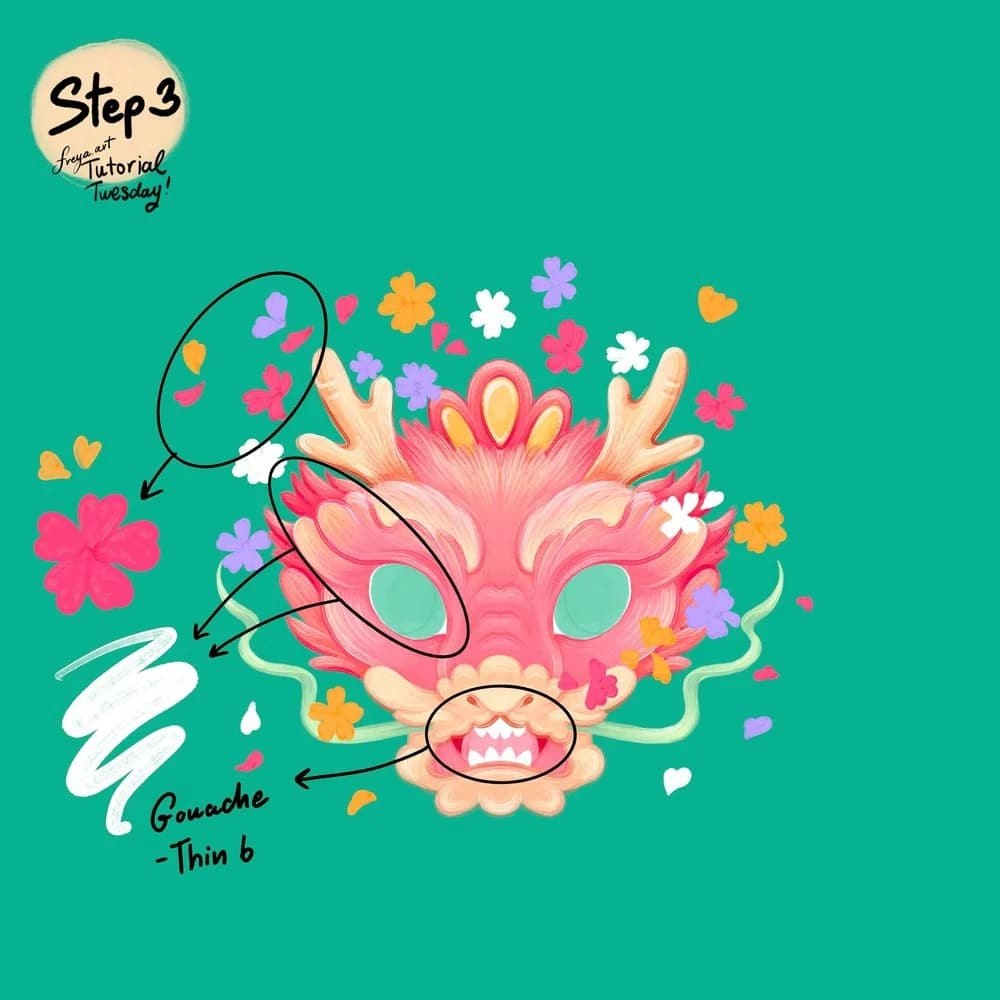
Step 3: Continue adding details with the Freya Gouache Thin No. 6 brush. Adding strokes of lighter colors give it a brushed look. Add a new layer for the flowers. Use the same Freya Gouache Thin No. 6 brush to draw the flowers. Add variation, draw some of the flowers facing sideways and others front facing.
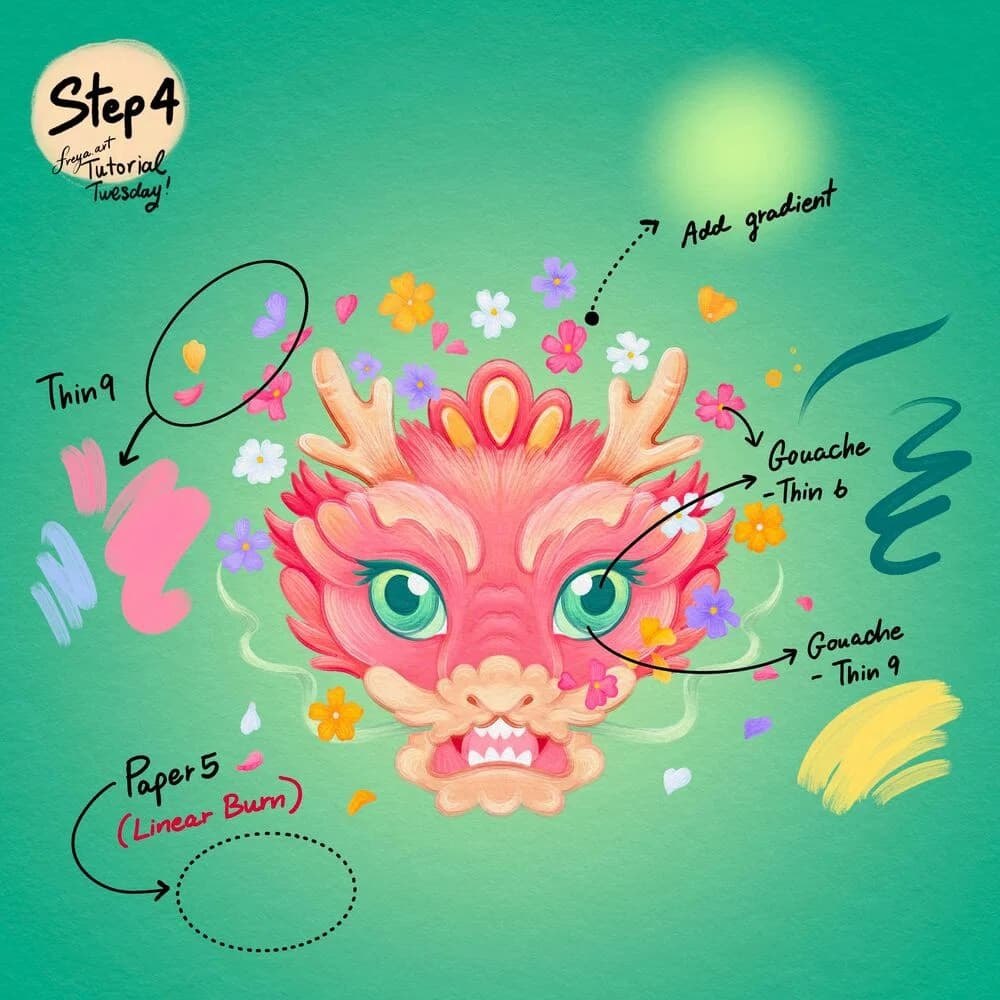
Step 4: For the eyes, add another layer underneath the base layers. Draw the eyes using Gouache Thin No. 6 and Gouache Thin No. 9. Add another layer underneath and create a soft gradient circle for the background. Then create a new layer, place it on top of all the layers and swipe on Gouache Paper No. 5 brush in a light grey color. Set this texture layer to Linear Burn (LB) mode.
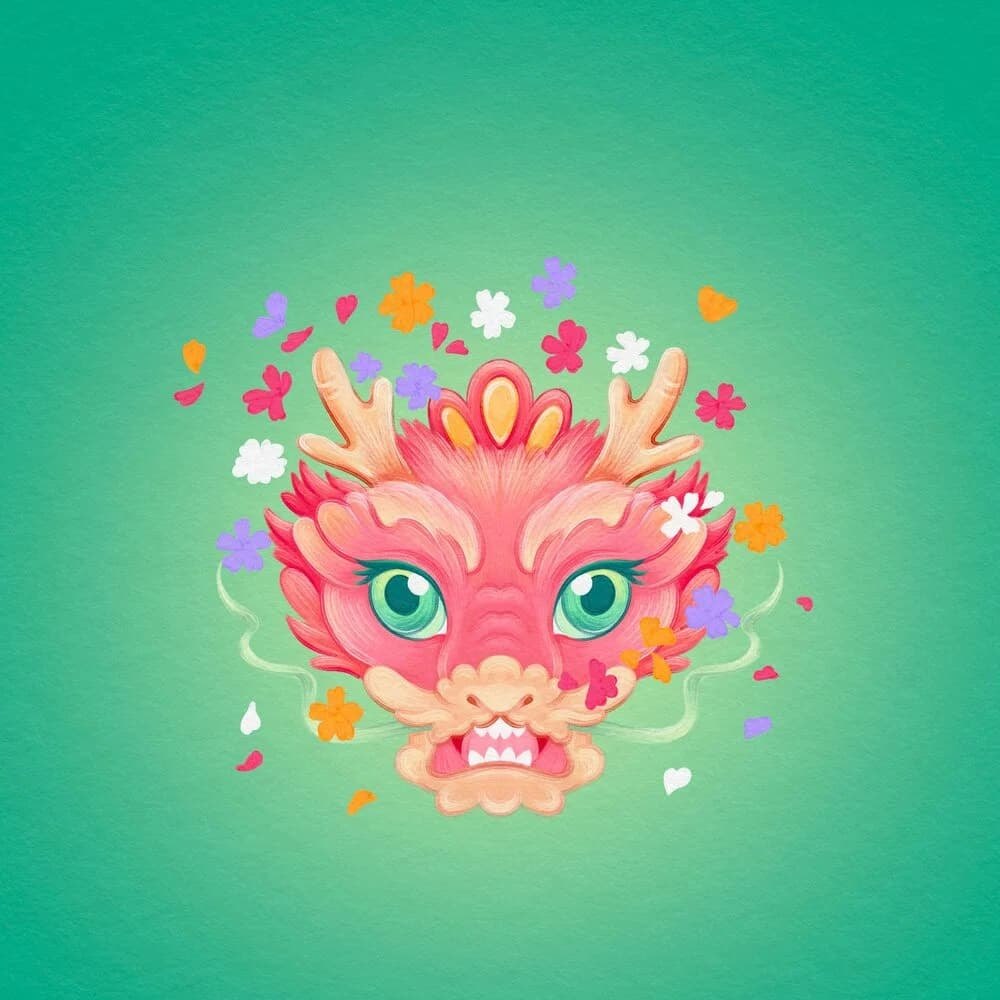
Congratulations! You've just completed this Dragon Head tutorial! Please feel free to tag me on Instagram if you decide to share your finished work online. I'd love tosee your version.
Try two real lessons from Freya's Gouache Brush Set, free
Not a trailer. Actual lessons from the course. After you confirm your email, they open in Freya Studio and stay yours.
- Full lesson
Thin Gouache Brushes
The complete lesson, not a preview
- Full lesson
Gouache Blender Brushes
The complete lesson, not a preview
- ✓Yours after email confirmation
- ✓No card, no trial
- ✓Opens in Freya Studio
Keep making

Source: freya.courses