Grab the free brush for this tutorial
Made by Freya · works in any Procreate version
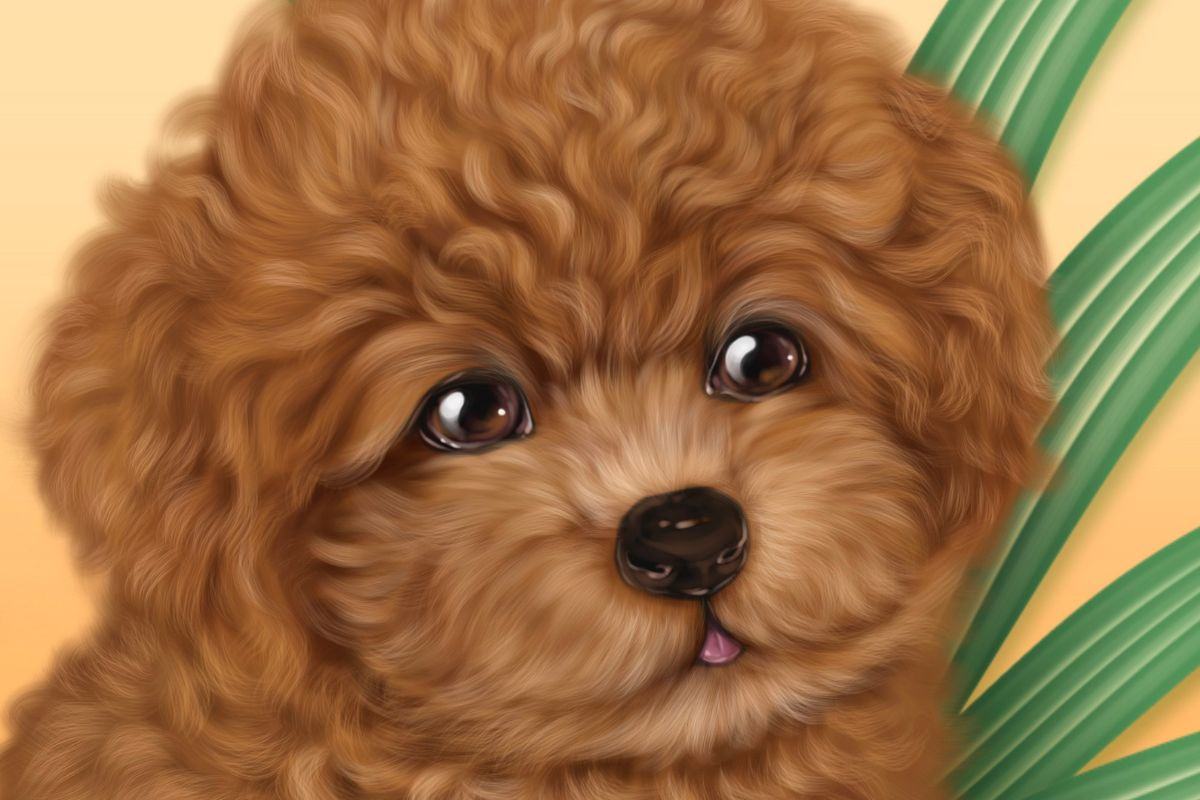
In this tutorial, we are going to paint a curly-haired poodle portrait using brushes from my Pet Portrait Purrfection Course. Please download the tutorial files before you begin. It will include the sketch, swatch palette, and free brushes.
Once downloaded, go to your Downloads Folder on your Files App. Tap on the zip file and it will create an unzipped folder. From there, just tap on the .brushset file and the .swatches file and they should import automatically to Procreate. You’ll find the brush set in your Brush Library and the Palette in your Palette’s tab inside the Color Panel.
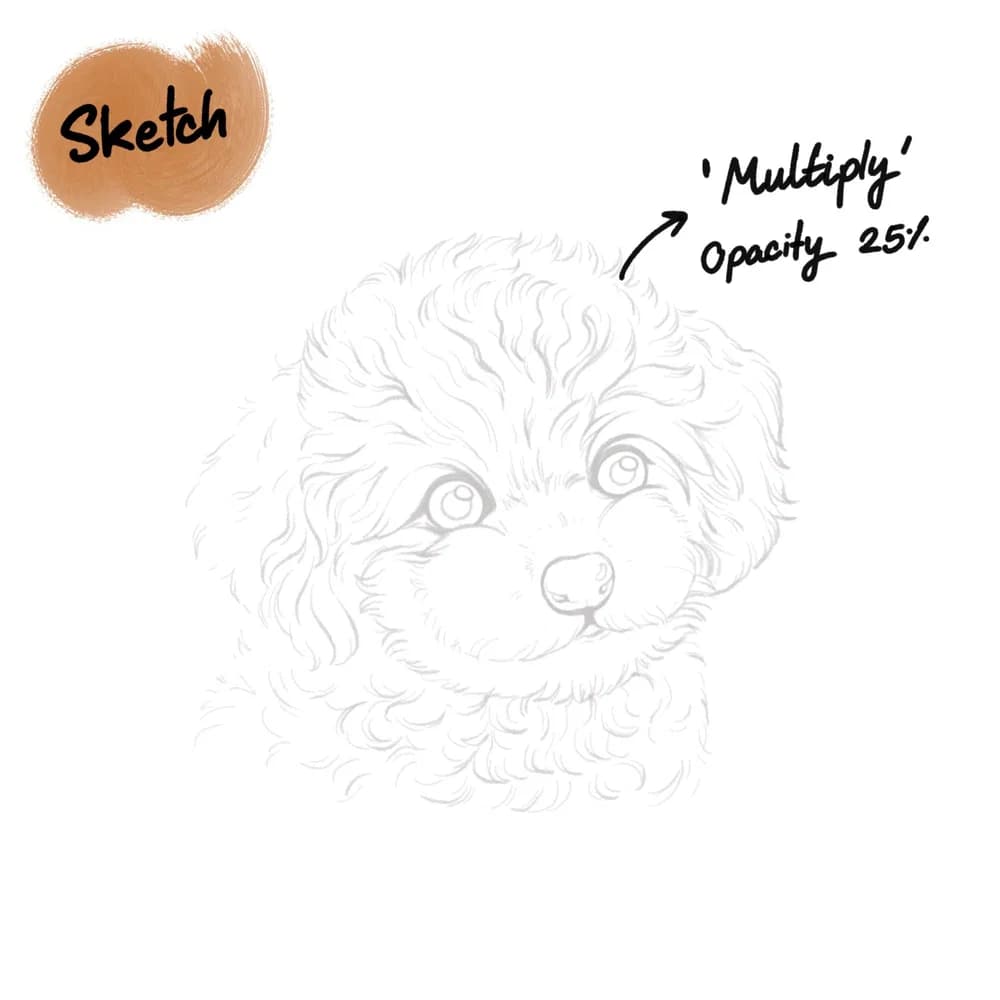
Let’s start by creating a 3000 x 3000 pixel canvas. Download the sketch file to your photos app and import it to Procreate. Once imported, tap on the sketch layer and the letter “N”, scroll up the options and choose Multiply. Then lower the opacity to 25%. Lock this layer so we don’t accidentally color over it. In my Pet Portrait Purrfection Course, I teach my students to draft the sketch using a connect-the-dots technique. But for this tutorial, you can just use the sketch I provided.
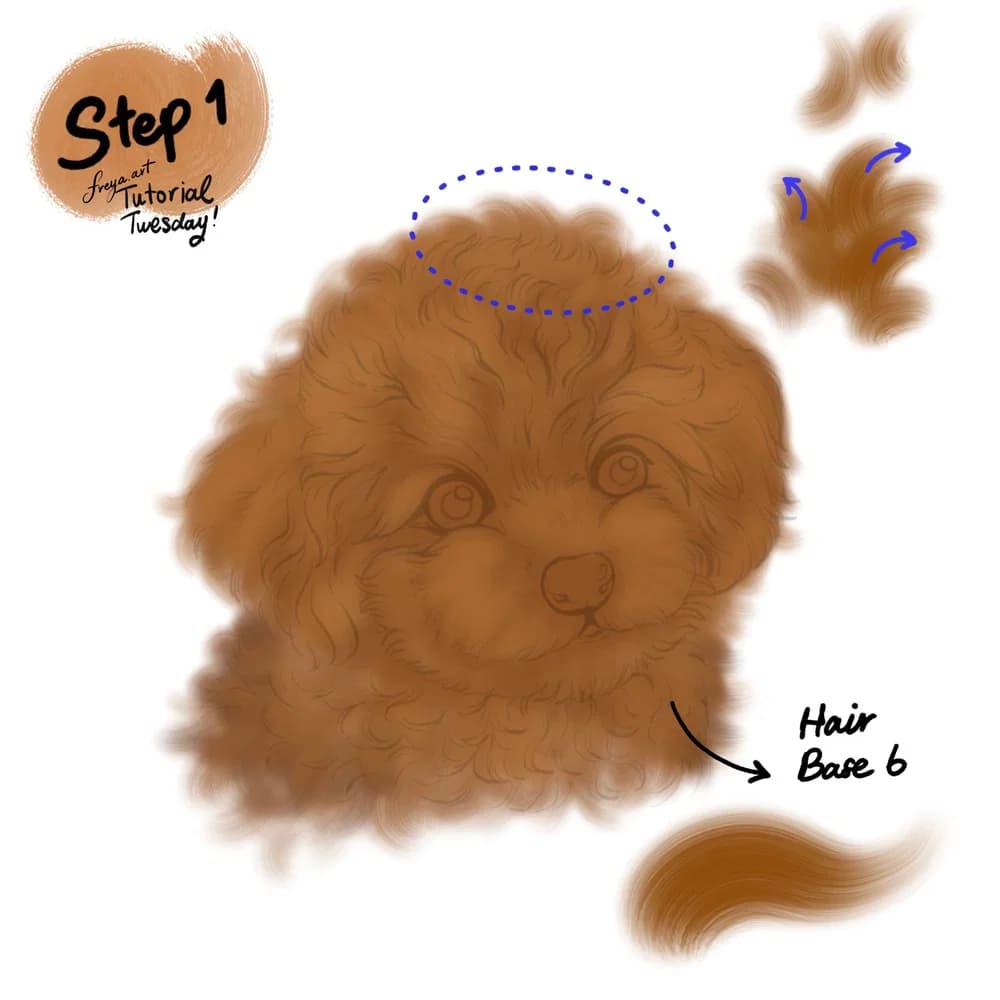
Step 1: Add a new layer under the sketch layer. Choose the brown color and then use the Hair Base No. 6 brush to create your base color.
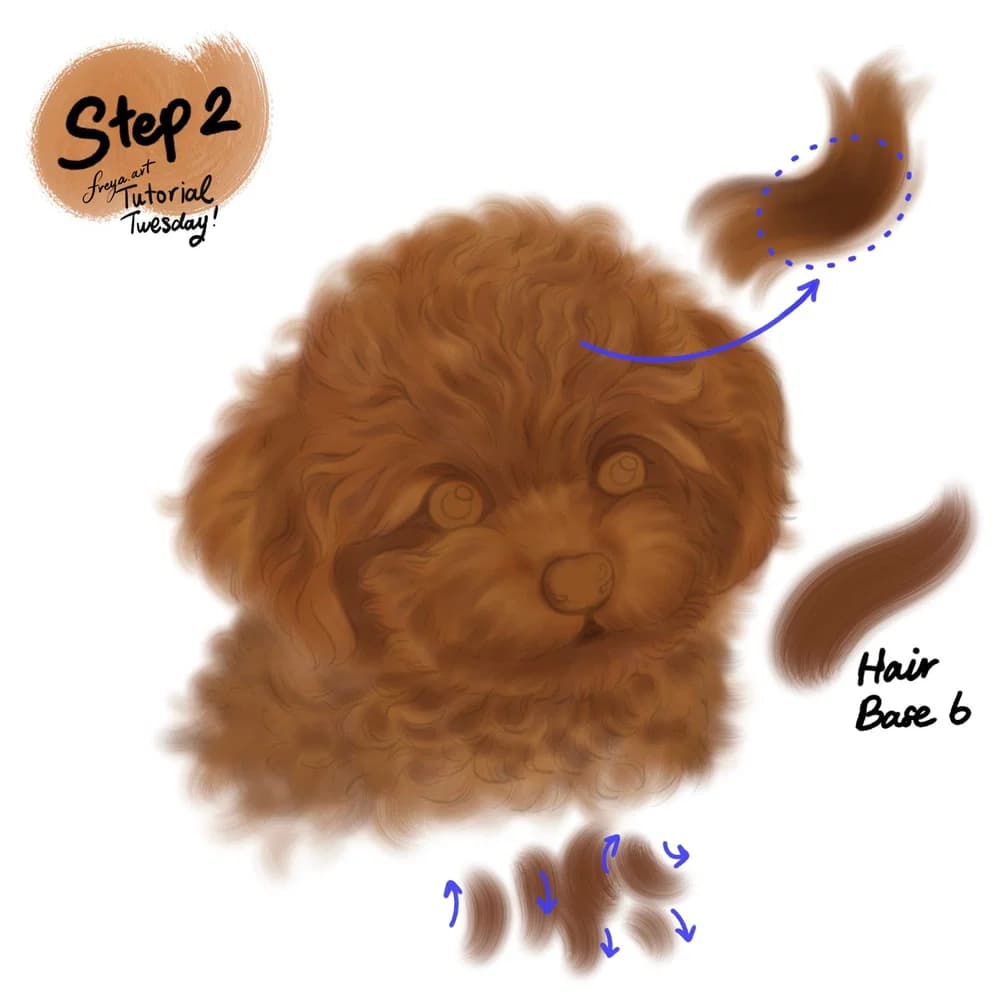
Step 2: Add another layer and set it as a clipping mask on top of the base layer. Using the same brush, start by adding shadow areas around the eyes, mouth, and some parts of the neck and ear flaps. Once you have the base colors mapped out, you can go ahead and turn off the sketch layer.
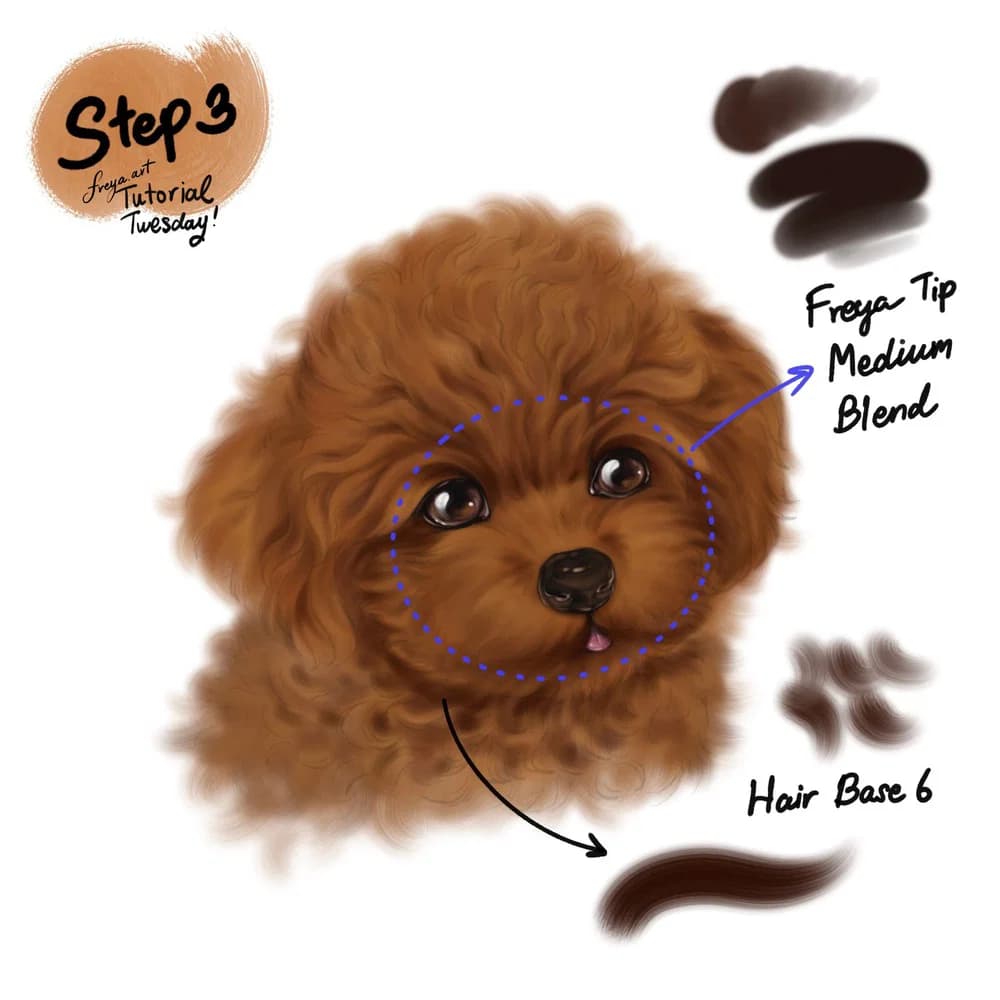
Step 3: Add a new clipping mask layer. Using the same brush, add even darker tones to the fur under the neck. Paint with a curling motion outward. Then use Freya Tip Medium Blend to paint the eyes, nose, and tongue. Add catchlights to the eyes using a white color.
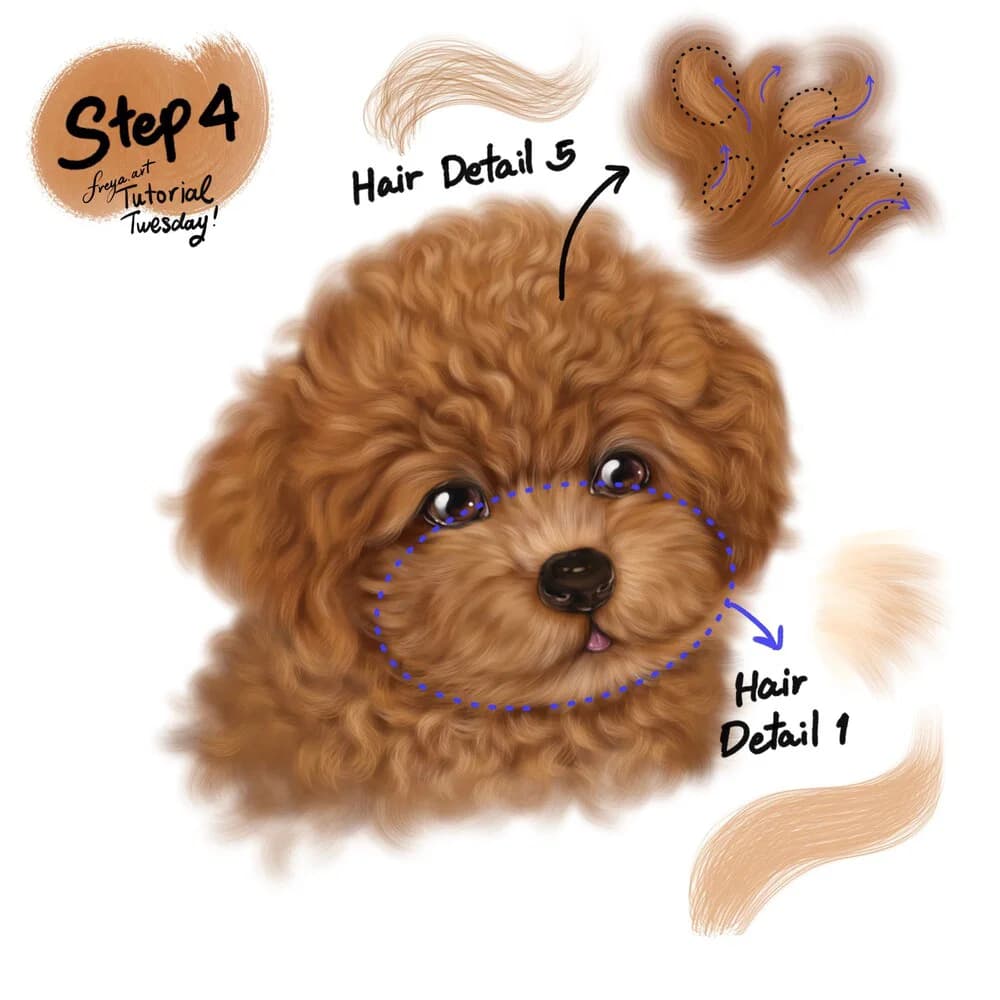
Step 4: Now add another layer, using Hair Detail No. 5 add the highlights to the top of the head. It’s still curly but direction is upward and outward. Use Hair Detail No. 1 to add highlight to the snout. The fur should move outward from the nose.
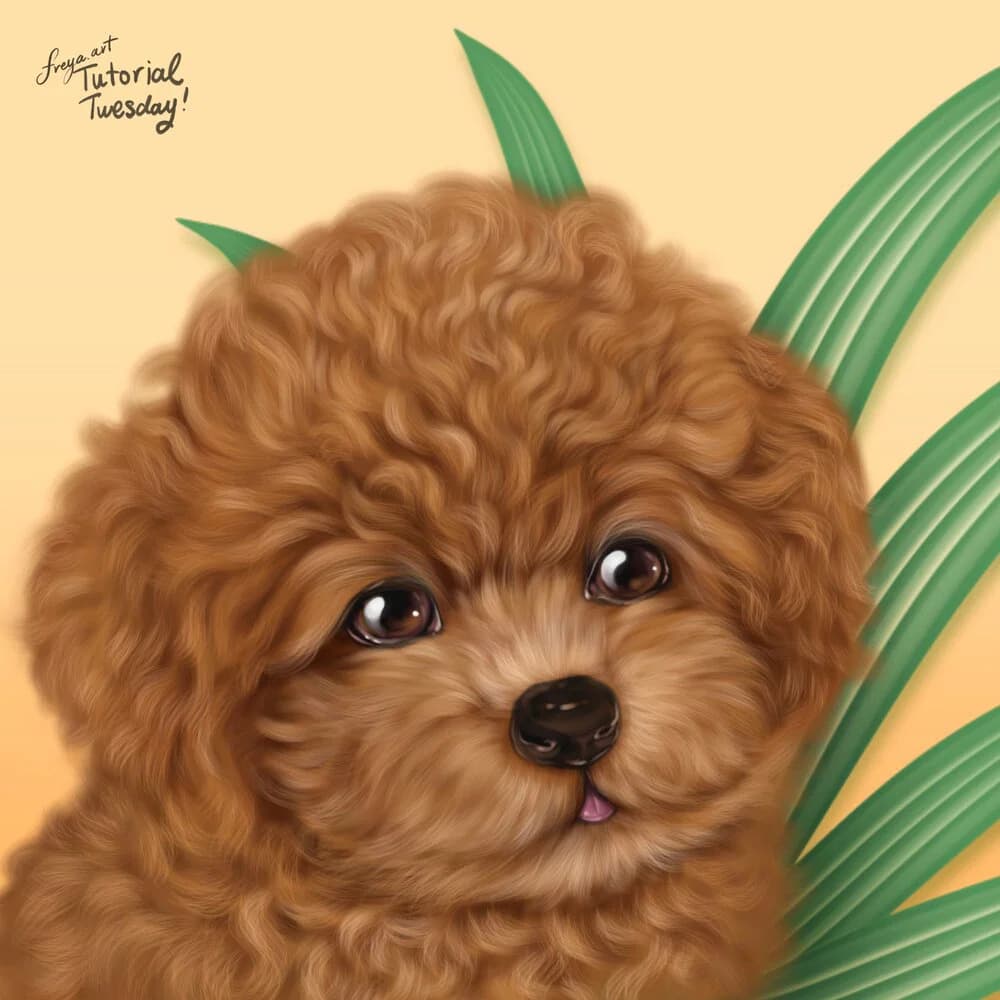
And there you have it! You can keep it as is, or have fun with the background by adding leaves or drawing pet toys. If you enjoyed this short tutorial, please check out my Pet Portrait Purrfection course for a more in-depth way to draw pet portraits from scratch.
Written by
Digital illustrator and Procreate instructor of 15+ years, and the founder of Freya's Academy. Her client work includes Louis Vuitton, Tiffany & Co., and Sephora, and every course teaches the same techniques she uses on it.
More about Freya →Try two real lessons from Pet Portrait Purrfection, free
Not a trailer. Actual lessons from the course. After you confirm your email, they open in Freya Studio and stay yours.
- Full lesson
Fur Ball Practice
The complete lesson, not a preview
- Full lesson
Draw Anything from Scratch: Connect the Dots
The complete lesson, not a preview
- ✓Yours after email confirmation
- ✓No card, no trial
- ✓Opens in Freya Studio
Keep going
Impasto Brush Set
Thick paint texture, a natural next step after free fabric tools.
Keep making
Source: freya.courses